Eclipse Setup for Hadoop Development
Objectives
We will learn the following things with this tutorial
- Setup Eclipse plugin for Hadoop
- Setup Hadoop Location in Eclipse
- Create and run Hadoop project
Prerequisites
The following are the prerequisites for setting up Eclipse for developing Hadoop programs running MapReduce and further extensions.- You should have the stable build of Hadoop
- You should have eclipse installed on your machine
Setup Eclipse plugin for Hadoop
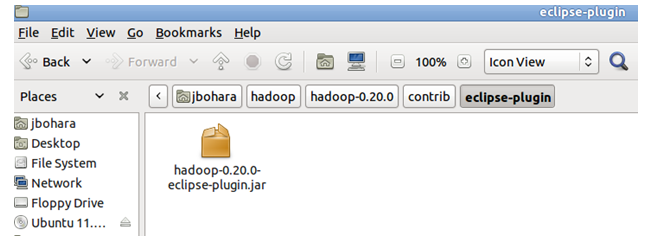
- Go to the Hadoop eclipse plugin folder where the file hadoop-x.x.x-eclipse-plugin.jar resides.
The plugin usually resides under folder /hadoop-x.x.x/contrib/ eclipse-plugin for example: hadoop-0.20.0/contrib./eclipse-plugin.
But it seems they removed the plugin from /hadoop-x.x.x/contrib/ (in my case, x.x.x=1.0.4).There's a eclipse-plugin folder in /hadoop-x.x.x/src/contrib/ but I could not see any hadoop-1.0.4-eclipse-plugin.jar inside this folder.

In such case you have to create your own plugin. I have created hadoop-eclipse plugin jar for version 1.0.4. You can find it here.
2. Copy
the file " hadoop-x.x.x-eclipse-plugin.jar” from the Hadoop eclipse plugin
folder to the Eclipse plugins folder.

3.After
you have copied the plugin, start Eclipse (restart, if it was already started)
to reflect the changes in the Eclipse environment.
4. Go
to the Window àOpen
PerspectiveàOther
option of the menu bar in eclipse,

Now you can see the option
Map/Reduce in the list of perspectives.

As you select the “Map/Reduce”
perspective, you’ll notice few additions in the eclipse views.

The DFS locations are now directly
accessible through the Eclipse configurations. Use the MapReduce Locations View
to configure Hadoop Access from Eclipse.

Setup
Hadoop Location in Eclipse
1. After you switched to the Map/Reduce perspective select the Map/Reduce Locations tab located at the bottom portion of your eclipse environment. Then right click on the blank space in that tab and select "New Hadoop location...."from the context menu. You shall see the dialog box similar to the one shown below.

2. Fill in the following items, as shown on the figure above.
Location Name -- localhost
Map/Reduce Master
Host -- localhost
Port -- 9101
DFS Master
Check "Use M/R Master Host"
Port -- 9100
User name -- User[Bohara in my case]
Then press the Finish button.
Map/Reduce Master
Host -- localhost
Port -- 9101
DFS Master
Check "Use M/R Master Host"
Port -- 9100
User name -- User[Bohara in my case]
Then press the Finish button.

4.You have to start hadoop in order to use this plugin. Open your terminal, navigate to hadoop folder and then execute the command “/bin/start-all.sh”. Now you are ready to rock.

5.In the Project Explorer tab on the lefthand side of the eclipse window, find the DFS Locations item. Open it up using the "+" icon on the left side of it, inside of it you should see the localhost location reference with the blue elephant icon. Keep opening up the items below it until you see something like the image below

You can add there folders/files, delete folders or see the results of your Hadoop programs located in HDFS (instead of using the bin/hadoop dfs -ls or similar commands from the terminal!)
Create
and run Hadoop project
1. Right click on the blank space in the Project Explorer window and select New -> Project to create a new project.
2. Select Map/Reduce Project from the list of project types as shown on the image below

3.Press the Next button.
4.You will see the project properties window similar to the one shown below

5.Fill in the project name and then click on Configure Hadoop Installation link. This is located on the right side of the project configuration window. This will bring up the Project preferences window shown on the image below.

6.When Project preferences window shows up, enter the location of the hadoop directory in the Hadoop Installation Directory field as shown above.
7.After you entered the location close the preferences window by
pressing OK button, and then close the Project window
by the Finish button.
8.Now you have created your first Hadoop eclipse project. You should see
its name in the Project Explorer tab.
9. Now, after the Project has been created, create the Mapper, Reduce and the Driver Classes, by right-clicking the project and getting the options from New option
Map/Reduce
driver class
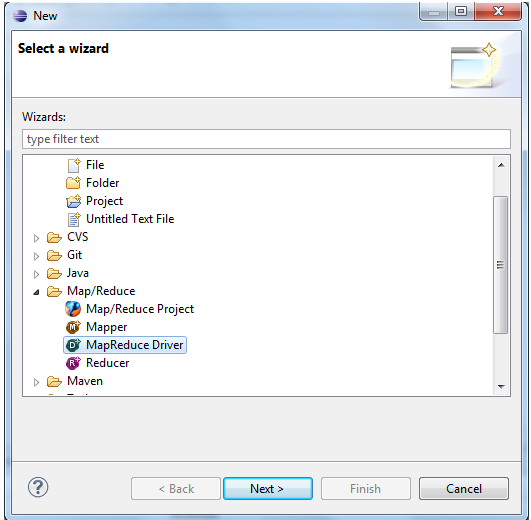
1. Right click on the newly created Hadoop project in the Project Explorer tab and select New -> Other from the context menu.
2.Go to Map/Reduce folder, select MapReduceDriver then press the Next button. As shown on the image below.
3.When MapReduce Driver wizard appears enter the TestDriver in the name field and press the Finish button. This will create the skeleton code for theMapReduce Driver.

4. Similarly you can create Mapper and Reduces classes
Running Hadoop Project
1.Right click on the TestDriver class in the Project Explorer tab and select Run As --> Run on Hadoop. This will bring up the windows like the one shown below.
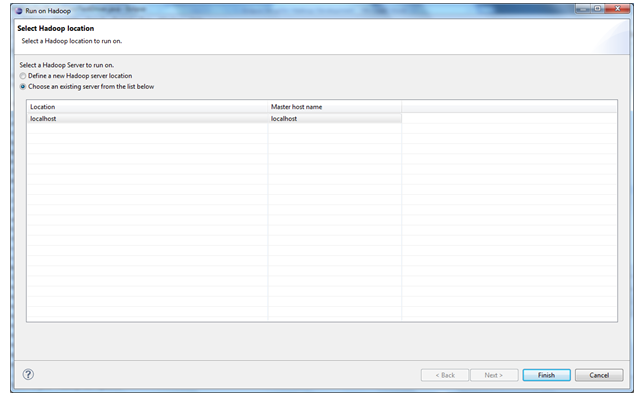
2.In the window shown above select "Choose existing hadoop
location , then select localhost from the list below.
After that click Finish button to start your project.
Comments